
In this part we'll discus the eyes and mouth.
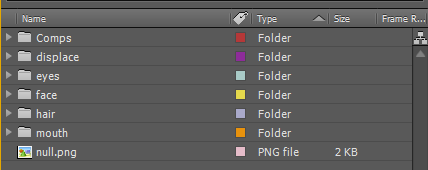 It is important to keep everything organized while working in After Effects. Give your files and folders appropriate color tags to differentiate themselves from each-other. Also it would be wise to tag compositions based on the file majority's tag color within that comp.
When in the composition window you can find the tag color by typing it into the search bar.
Also by right clicking the tag color you can choose to select all layers of the same color.
The parts needed for a simple eye are as follows:

Now you don't really need two identical eyelids in hindsight you just need one of each piece. I just wanted to slap this thing together without any unnecessary adjustments. We only need to make one eye then we duplicate the composition, flip it, and change the code a bit so the clone functions the same way.
From right to left this is how our tutorial will go:

So first things first slam the pieces for the eye in its own composition titled "eye." Align the eyelids so that they are just above and below the eye shape proper. Like so:

Select those two eyelids and pre-compose them, ( CTRL + SHIFT + C ) title the new comp "eyelids."
Now duplicate the eye shape and place it above the eyelids. Place these two layers above everything else. Go under the Track Matte Tab on the eyelid layer and choose alpha matte.

An alpha matte functions the same as a Photoshop clipping mask only the layer stacking is reversed. This is also how we make the mouth so keep this in mind - It's important.
In effects and presets under distort there is a filter called "Bulge." Throw this filter on to the eyelid composition.

I've moved the lid in a little to show it distorting - making it appear to wrap around the eye. It goes without saying to play around with the settings until you are satisfied.
The next step is to create a null object - I use these to help drive things. Place this new null object at the center of your pupil. Then toggle 3D layer on both the pupil and the null object.

Pull the null object away from the active camera view. Make the null a parent of the pupil - we're creating a pivot for the pupil. Play with the null's rotation to see if it looks like a ball rolling in a socket. Test until you get it right.

Duplicate another eye shape and put it above the pupil to make another alpha matte.
Now for the eyebrow - to get it to be all smooshy I don't use puppet pins - I use the warp filter. Add two warp filters on to the eyebrow. Now why two of the same filter? This is because I want to control the two differently.
One warp style is arc and the other is bulge. Arc gives a generic vertical bend through the center. Bulge can offset the center of this bend and sharpen one end of the brow. The only reason I don't use arc's horizontal distortion is because it appears to twist the eyebrow.
See the example:

The thick highlight is going to be the input for the controls of the eyebrow. Now that takes care of basic setup - It is time to understand a few basic expressions that we can output from a controller. Make a temporary controller - create a new null and zero out its position. Pre-compose everything save for the eyebrow and your new null controller. Name the new comp "eye scale" and let's start hooking things up.
Add a slider from the expression controls to your null object. You'll need 7 sliders at most (just hit CTRL + D to duplicate) and rename them: Pupil Scale, Brow Bend, Brow Center, Brow Horizontal, Brow Vertical, Top Lid, and Bottom Lid.
Separate the layer palate like so:


This will make pick whipping a whole lot easier.
ALT + LMB on any animation stopwatch property on any layer will get you an expression prompt. This is how you will come to drive objects in separate compositions and link everything.
This is what it looks like:

Pick whipping an expression is just like regular parenting only across multiple compositions.
This is what the eye looks like all hooked up:
 |
| *To separate dimensions just right click position and select separate dimensions. |
I've annotated this picture so you know what needs special attention. Otherwise it is happy pick whipping time! Despite the terrifying image this is easier to follow over me doing this step by step (also not nearly as dull).
A few noteworthy expressions need some explaination:
+ Original Value
For example:
thisComp.layer("eyeCtrl").effect("Brow Horizontal")("Slider")+250This keeps the controller at default values - which is better than opening the rig starting at a number like 34.5. Most of this is to help the animator animate without getting confused.
*-1
This reverses the math. The expression tag essentially states, that I'm multiplying negative one. A common example is the eye. You have a division between the two-dimensional position values of the controller and the three-dimensional rotational values. Y rotation is not the same as Y position so controlling it is awkward.
To solve this I for one flipped the math (*-1), and secondly switched y positon with x's rotation. Forcing it to behave more like a position than a rotation.
Here's how it should look bear in mind the names in parenthesis are dependent on what you named your layers:
comp("eye_rt").layer("eyeCtrl").transform.xPosition*-1This next expression is helpful in dealing with the pupil.
Scale Pupil is a slider under the effects attribute of the controller that I had you create.
Its default value is 0 there is a reset button above this value - it is REALLY helpful when animating.
This is how to keep Scale Pupil at 0 while keeping the layer pupil to stay at the default 100 scale value:
temp =comp("Eye Comp").layer("Eye Ctrl").effect("Pupil Scale")("Slider");The lower bit adds the original value with the new value from the controller.
[temp + transform.scale[0], temp+ transform.scale[1], temp + transform.scale[2]]
Temp is essentially the incoming value from the controller.
Transform.scale[0] is equal to the original scale value of x, [1] = y, and [2] = z.
That basically covers the eye. On to the mouth which will be shorter than the above.
Parts you'll need:

Make a new composition and throw these bad boys into the mix. Most of what I already taught you should be apparent in the construction of the mouth. The smaller black open mouth shape is the alpha for the tongue, chompers and uvula's alpha mattes.
The closed mouth is just the same as the eyebrow with two warp filters. The same is true with the open mouth only the tongue, chompers, and uvula is static.

The real mystery is how to replace layers. Toggling these layers visibility and easily key framing it in a single abrupt change. The secret is through the check box expression control. The great thing about this control is that it only has stepped key frames.

However the check box's value when activated is only 1. If I was to hook it in to a layers opacity and activate the box it will only give me 1 opacity. To make this useful tag this at the end of the expression:
*-100
There you can now use the check box for something useful.
This is how the layer stack looks when completed:

In our next tutorial we will begin the head. Till next Saturday! I know I didn't state that in the first post, but every Saturday I'll post a tutorial of some sort.
If there is any questions or requests feel free to leave a message.
Head Tutorial:
Nimbus Link: First Post
360 Head Tutorial Part 1: Design
360 Head Tutorial Part 2: Eyes and Mouth
360 Head Tutorial Part 3: The Head
No comments:
Post a Comment